Monday, September 9, 2013

Milk Glass DIY


Milk Glass DIY

Milk glass is lovely and I found a site that shows how to take an ordinary vase and make it into a milk vase, (refer to the bottom of page for site). 
How I did this is I chose Appliance epoxy Rust-Oleum paint. It is washable and moisture resistant which is what I was looking for. It worked beautifully. I first washed the vase with soap and water, and then with vinegar on a wet cloth. I let this dry completely then sprayed on the paint. It was very easy to do.

This is the vase that I chose to use.

After painting the vase let it dry for at least 2 hours before attempting to pick it up.

The finished project.

I was pleased with how it turned out.


Make sure you check out 
                                                           www.thehappierhomemaker.com
 because this is where I got my inspiration from.


Friday, September 6, 2013

What should I plant in my shade flower bed?


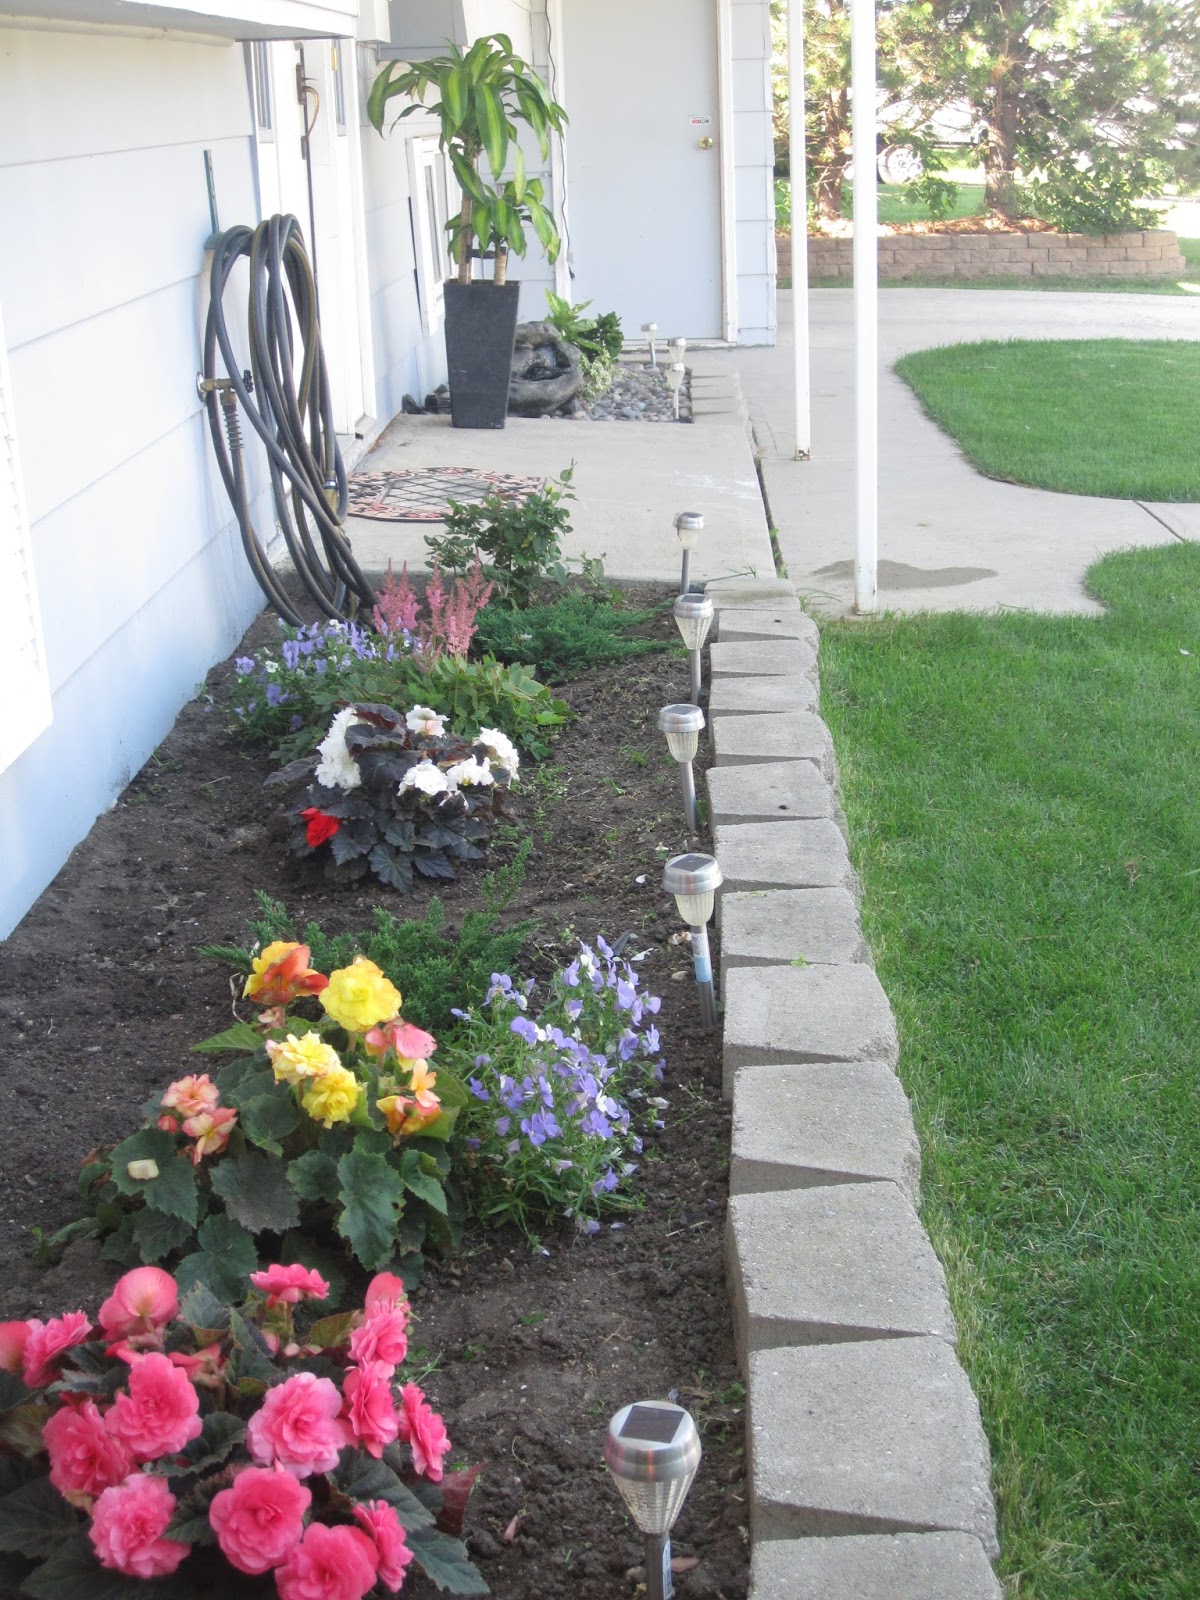
When Canadian Tire had their annual hanging basket sale, I went out and bought three 10”hanging baskets of begonias. I took them out of there pots and planted them right into the ground.

Because we don’t have a long growing season here I wanted to give them as good a start as I could. They have done so well this year that I will be buying them again next year. At $11. a hanging basket I figure it’s quite a good deal. I water them in the morning and try not to water too much of the

 
leaves, this gives them a chance to dry out during the day yet still be a bit humid. When evening comes they are completely dry on the surface which is what I want for the night, this way they don’t have a chance to get diseased. I also have an overhang on my flower bed so when it rains I still don’t get any rain on them therefore they rely only on my watering them.


 My  flower bed only gets about 3 hours of sunlight late in the afternoon. I also thought perennials would be a good choice. I planted cedar and astilbe.


These are the astilbes.


 In my second flower bed on the other side of my door nothing grows.  What I did was covered it with plastic and then put down rocks, added a water fountain and a pot with a kalancho and ivy.
 
 I also have a couple of little ornamental gophers poking there heads up amongst the rocks .
My pot with ivy and kalancho.
I also have a potted palm beside my door.


Wednesday, September 4, 2013

floor vase

 This vase is nice all on it's own, but if you want to put a little extra into it you can use an assortment of twigs, and either real flowers or silk. In this arrangement I have put silks in. I like to at least double the height when I'm doing an arrangement.


 I started with twigs.

 Two dogwoods were used. This looks nice just the way it is, but if you wanted to give it just a little more you can use some feathers,

 and berries,
 a sunflower,

and a hyacinth. On one of the pictures I have put the sunflower on the bottom, and the other picture the sunflower is in the middle.
 

How to arrange flowers in a cube vase


How to arrange flowers in a cube.


To arrange flowers in a cube it is best to get a grid that is made for the cube. They are clear plastic that you peel off of a paper. Once you peel off the paper, one side is sticky to which you place on top of the cube. You have to tape around the top side of the cube in order for it to be totally secure. If you don’t have this type of grid you can tape every ½ inch each way. This will do just fine. Next, fill with fertilized water and if you don’t have fertilized water, put a drop or two of bleach in the water. This keeps bacteria from growing. Now for the greening, use leather leaf. Cut and strip sections of leather leaf and fill each hole of the grid. This holds the flowers in place, if you don’t put enough greens in, the flowers will not stand up on their own. Next use fern. This makes the arrangement feel airy. Now for the flowers, you can use whatever type of flowers you want. In this particular arrangement I used 3 roses, a couple of gerbera daisies, asters, 3 carnations, mini carnations, seeded eucalyptus, and pittasporum. The height was 11” by 11” across.


The yellow paper is what the grid sticks to that is peeled off.

 Filling the grid with leather leaf.
 Filled with leather leaf and fern.
 The finished project.
With the finished arrangement you can barely see the leather leaf underneath but it is essential to the arrangement in order for the flowers to stay where you have placed them. If the flowers don’t stay where you want them then you need to add more leather leaf.


Bird of Paradise


How to open a bird of paradise. This is what the bird of paradise looks like when it arrives at the flower shop. In order to open it the bird must be room temperature. If it has been in the cooler you must let it stand out for at least an hour before attempting to open it. When you open it place your thumbs on both sides of the flower and slides your thumbs down. The bird will pop out and then carefully open it up. Peel the thin layer of see through skin off. Place back in the cooler till you are ready to use it.

Birds look nice in any arrangement.
Birds in an arrangement.

About Me

I am married to a very kind and loving husband who has given me many laughs over the years. My two children are married and I have three beautiful grandchildren who give me much joy.
I want to show in this blog some of the arts and crafts that I have learned over the years.

                                                             God Bless Our Home
Hope you enjoy my blog!